CrossFit Gymnastic Grips
(english version below)
In diesem Beitrag lernst du alles, was du über Grips wissen solltest und wie man sie benutzt. Zudem stellen wir euch vier unterschiedliche Modelle von Picsil vor und erklären die Unterschiede.
Was sind Grips und bei welchen Übungen bzw. Workouts kommen sie zum Einsatz?
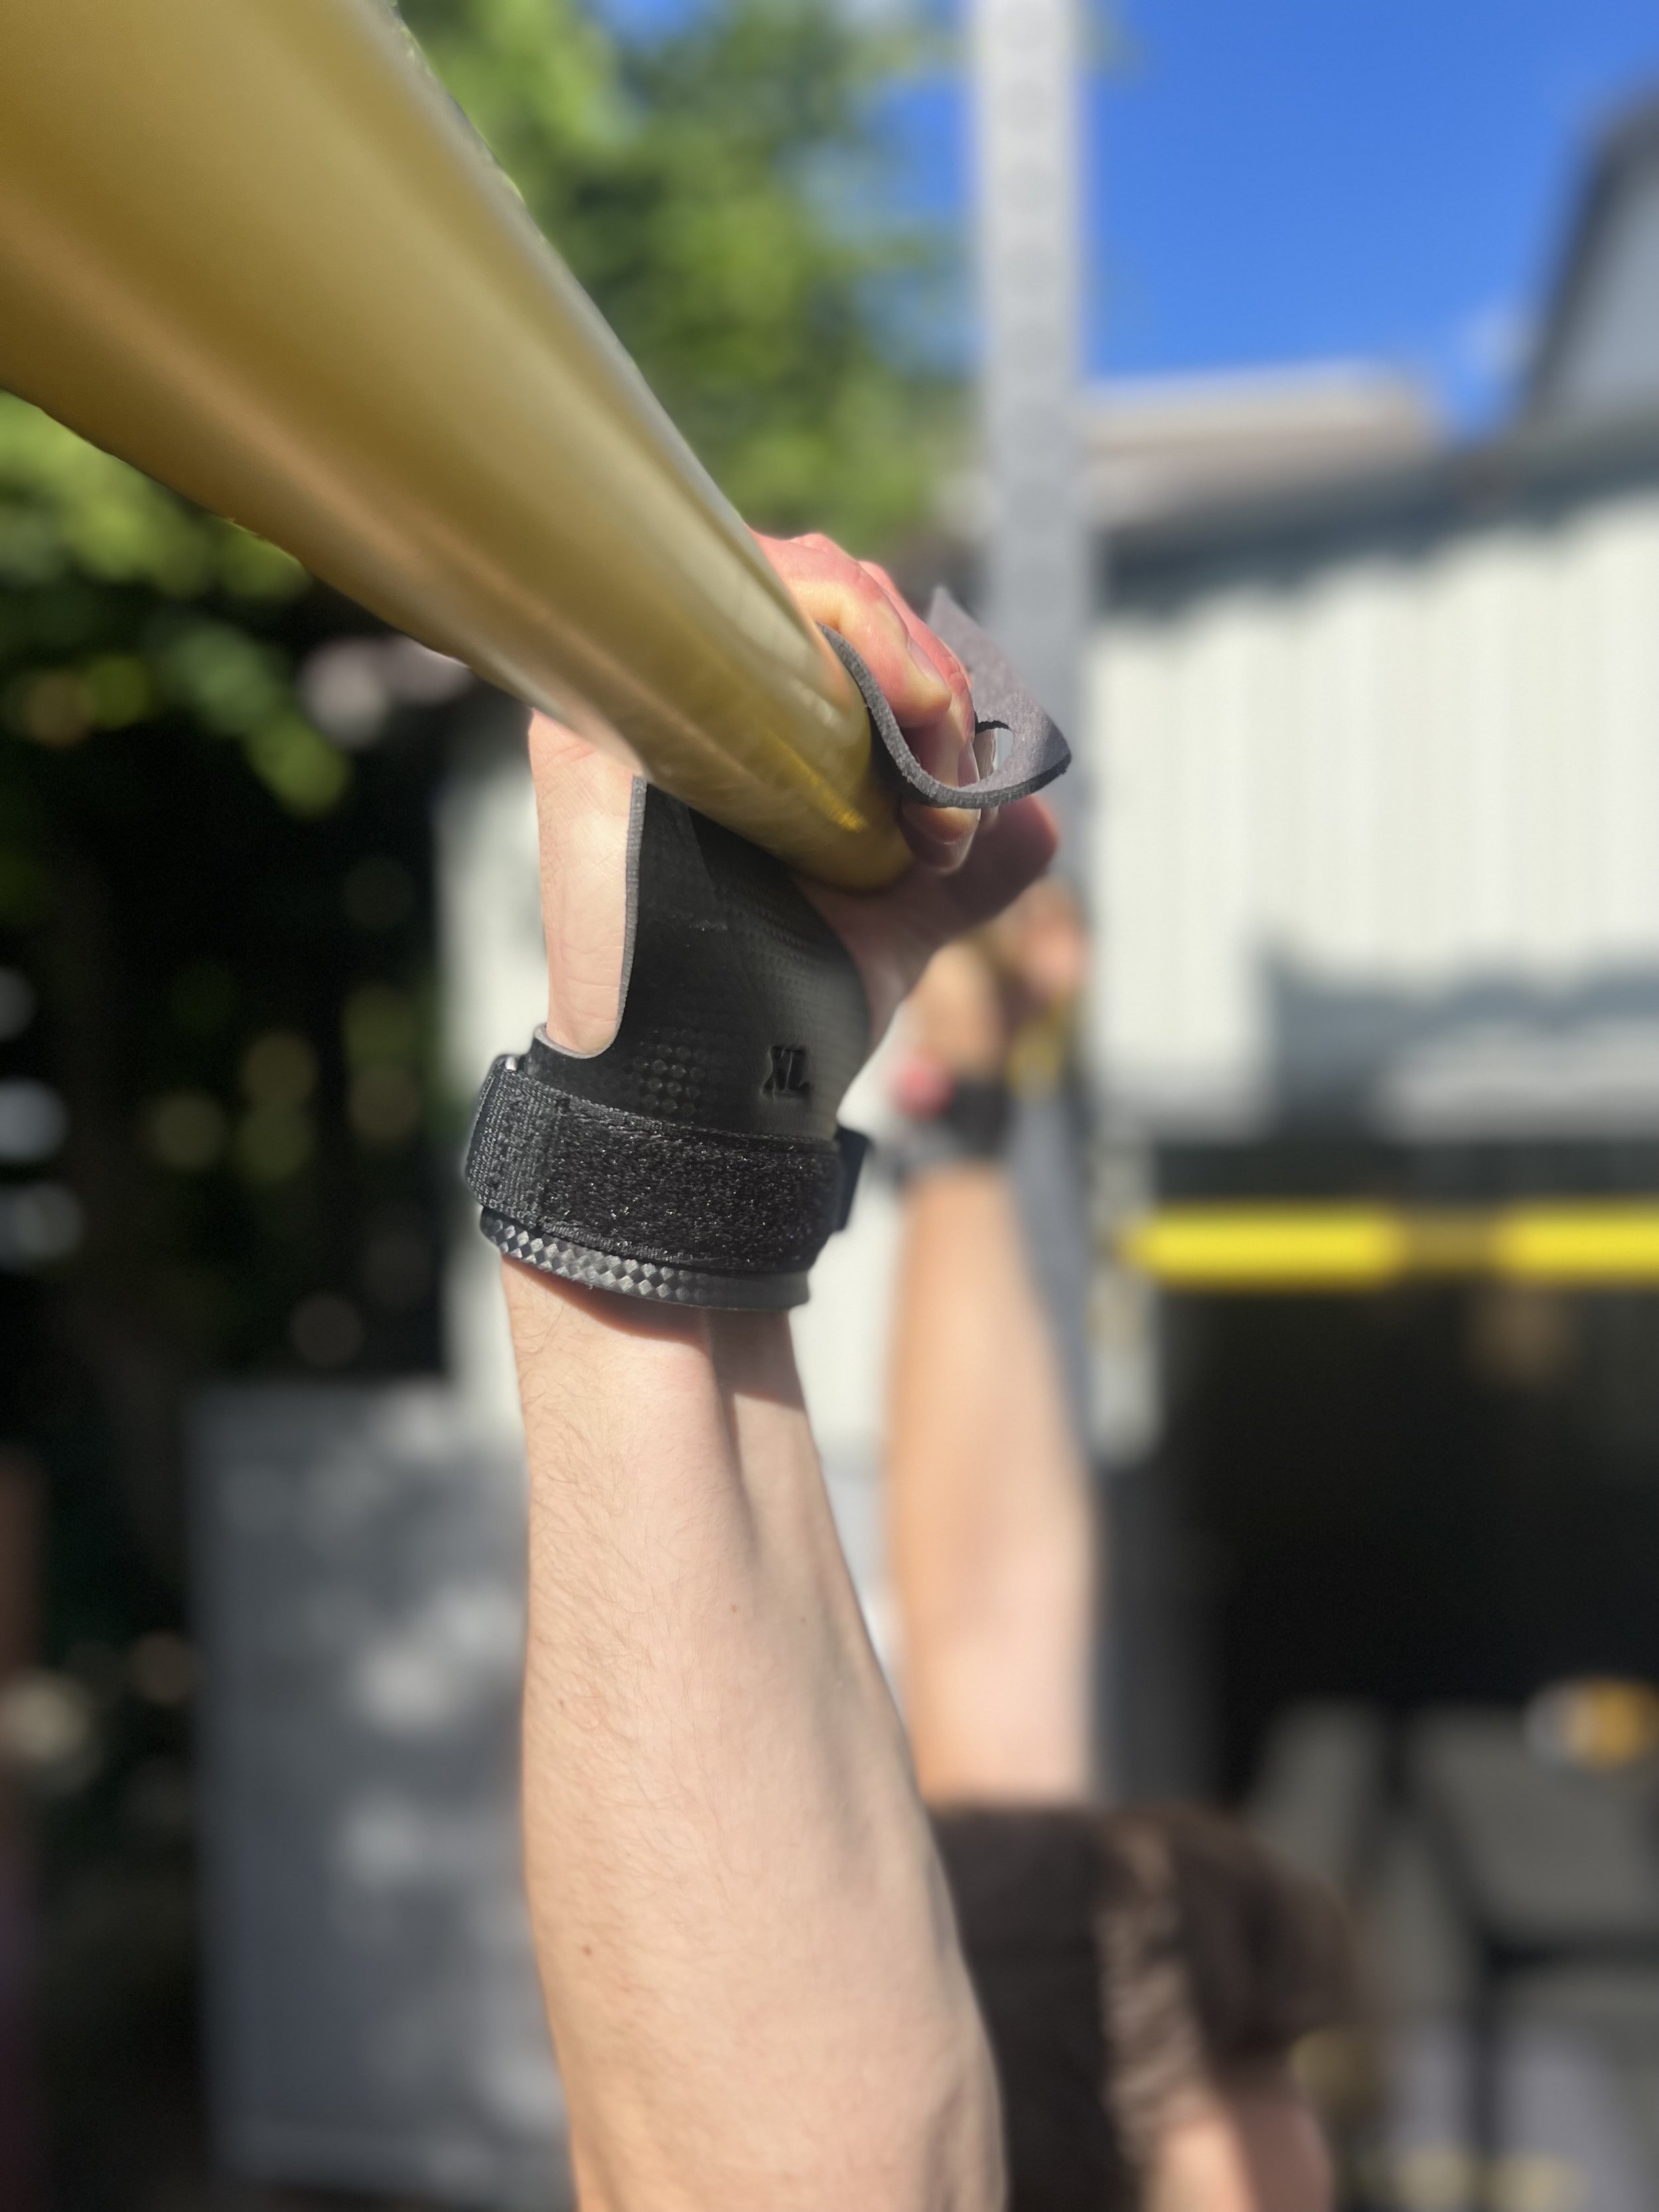
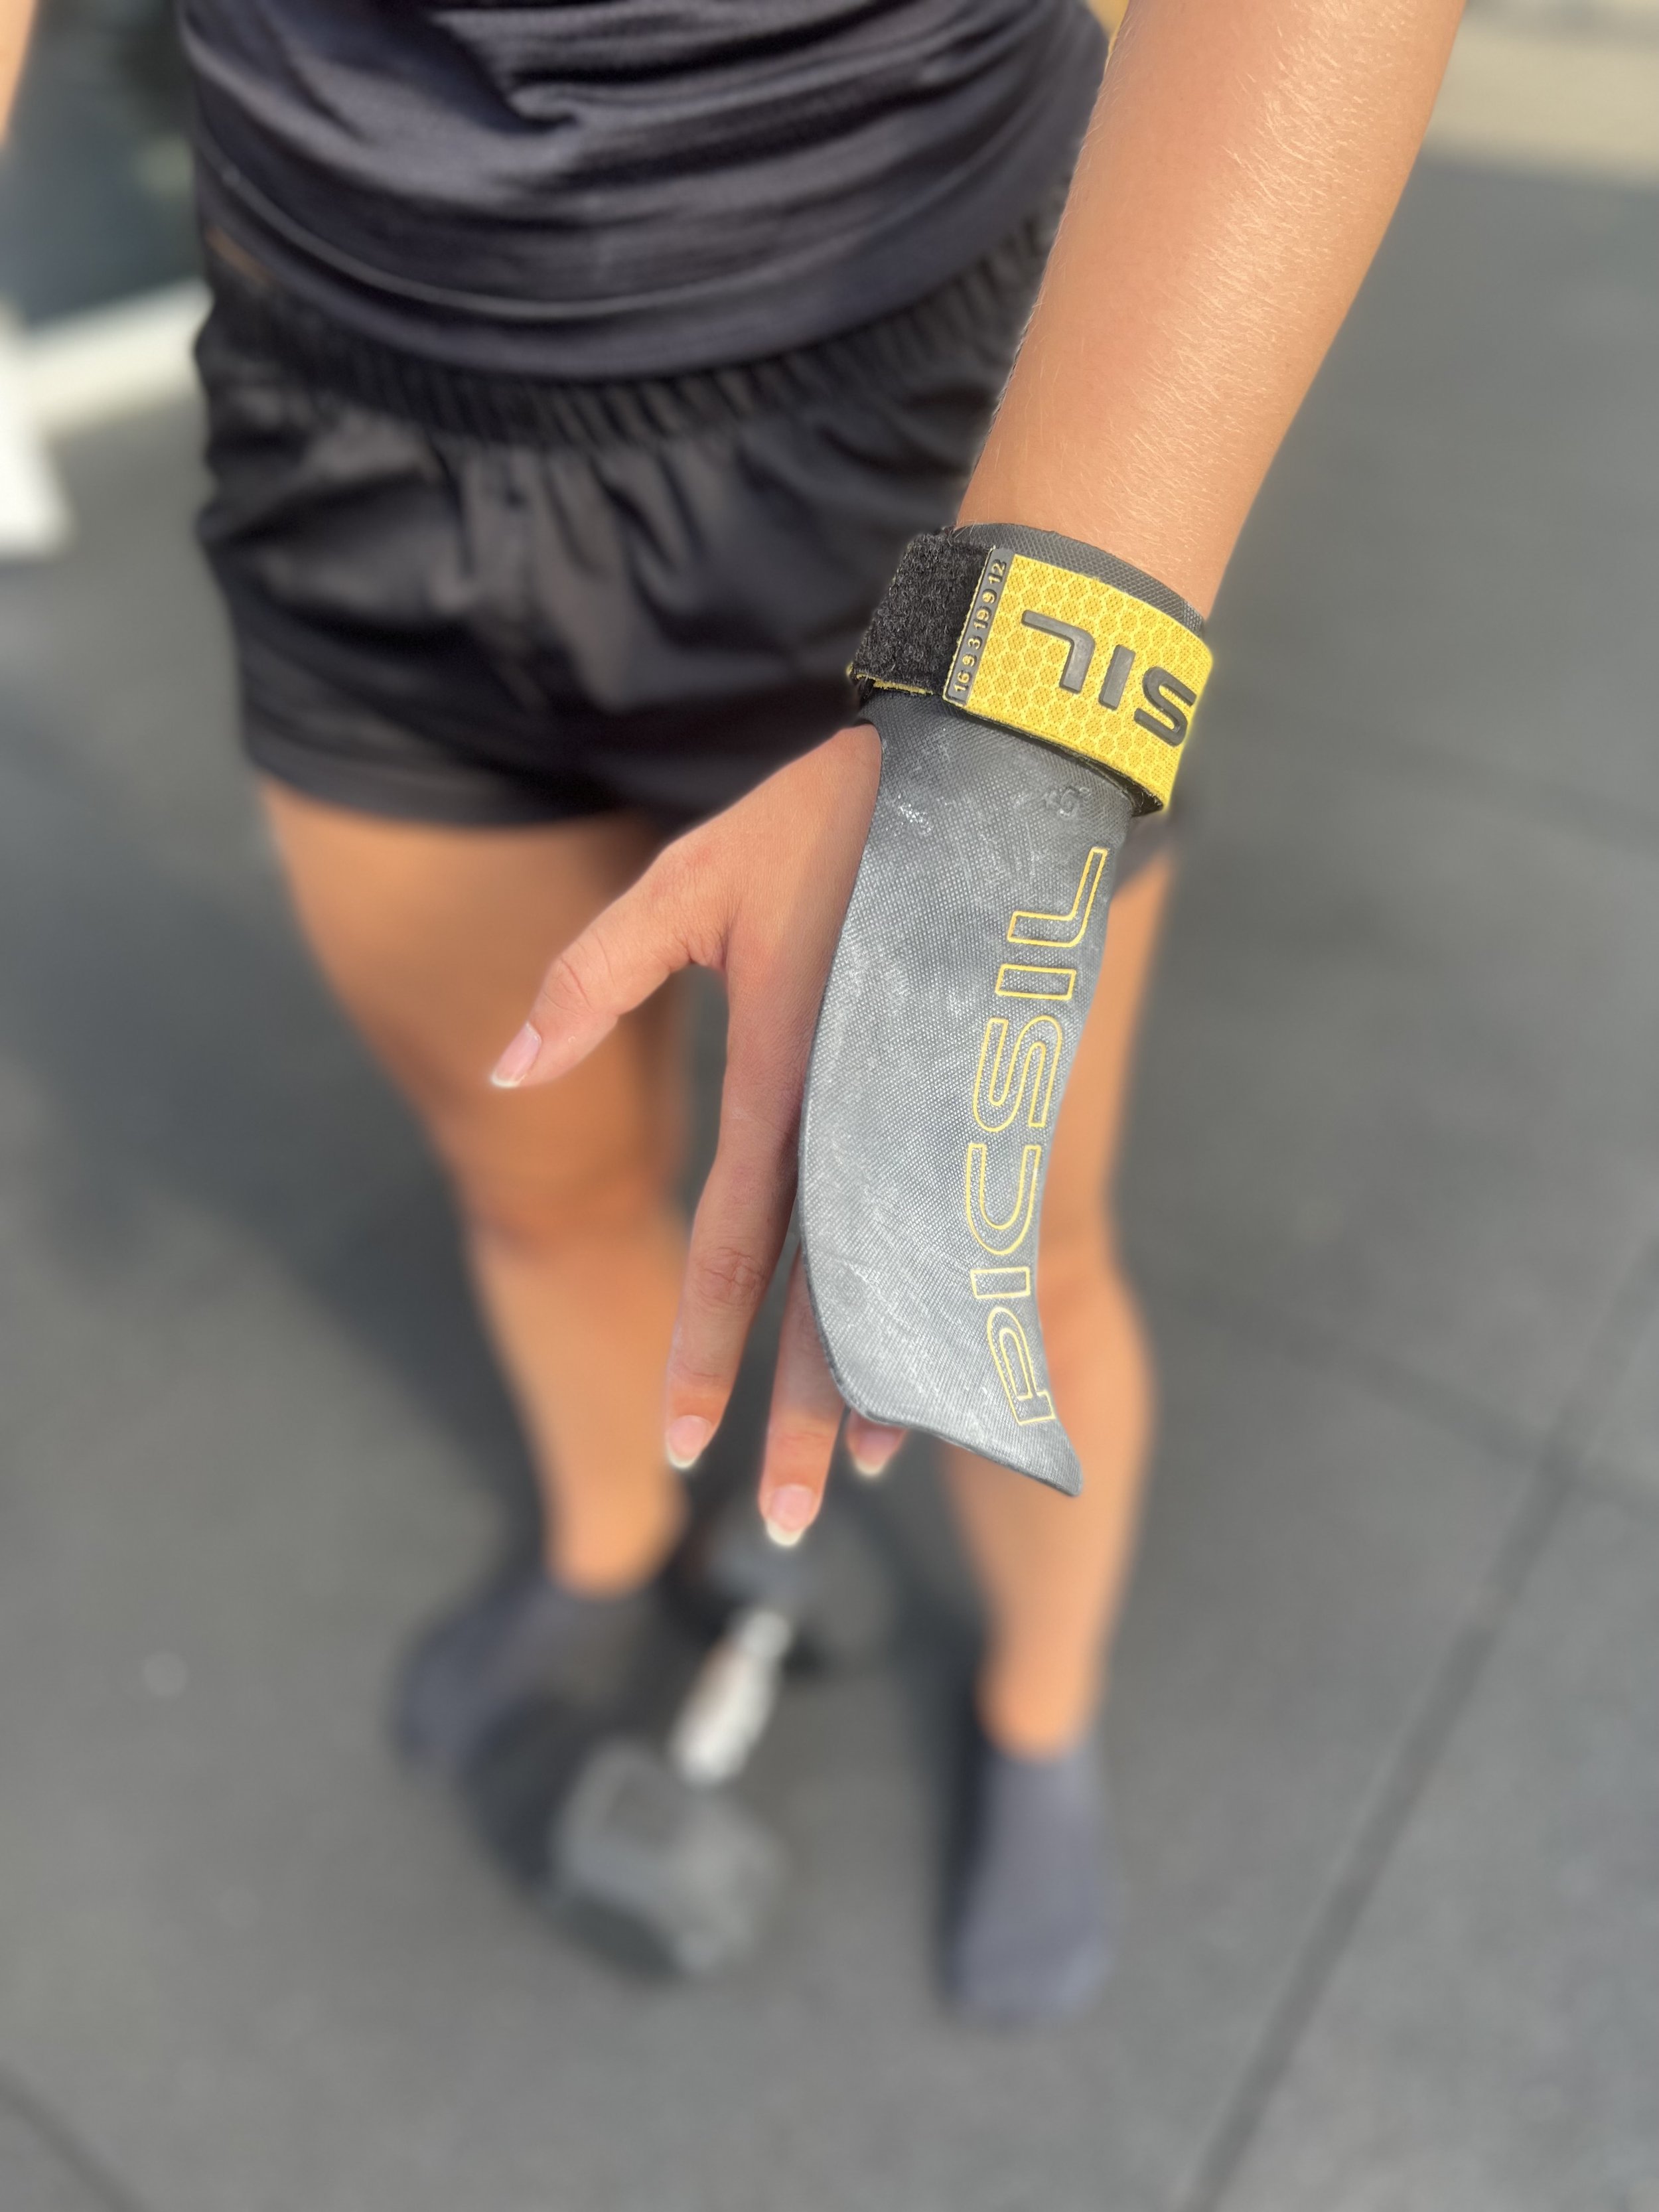
Grips sind sogenannte “Turnriemchen”, modifiziert auf den Einsatz für CrossFit Übungen. Sie bestehen meist aus einem synthetischen Stoff und werden für den besseren Halt und den Schutz der Hände verwendet. Mittels eines Klettverschlusses werden sie am Handgelenk befestigt (siehe Bild).
Zum Einsatz kommen Grips vor allem für alle Übungen an der Pull-up Stange, bspw. für Pull-ups, Toes to bars oder Muscle-ups. Sie helfen einen besseren und sicheren Griff an der Stange zu erlangen, und vor allem in Kombination mit dem Verschluss am Handgelenk, kann man länger an der Stange hängen. Somit sind auch größere Sätze bzw. eine höhere Anzahl von Wiederholungen möglich, ohne den Halt zu verlieren. Vor allem, wenn man dazu neigt, an den Handflächen zu schwitzen, sind Grips, neben Magnesia, eine große Hilfe. Man kann sie allerdings auch für Übungen mit der Kettlebell oder Barbell nutzen.
Warum sollte ich Grips verwenden?
Neben dem bereits erwähnten offensichtlichen Plus, dass man sicherer und länger an der Stange hängt und sich dadurch deine Workout Performance verbessert, ist ein weiterer Vorteil, dass man seine Hände mit Grips vor dem Aufreißen schützt. Das bedeutet nicht, dass es nicht passieren kann, die Gefahr wird lediglich minimiert, da man nicht im direkten Kontakt mit der Handfläche zur Stange ist.
Das Aufreißen passiert normalerweise, wenn man viel Magnesia benutzt. Diese trocknet die Hände oftmals aus (was natürlich gewollt ist, man möchte einen rutschfesten Griff an der Stange). Wenn sich allerdings bereits viel Hornhaut auf der Hand gebildet hat und die Hände nicht ordentlich gepflegt werden, sprich die Hornhaut abrasiert und sie durch Cremes weich gehalten werden, kann es eben passieren, dass sich die Hornhaut komplett von der Hand ablöst. Das hat meistens zur Folge, dass man es die nächsten Wochen im Training ruhiger angehen muss, bis die Handflächen wieder komplett verheilt sind. Diese Gefahr kann man mit Grips definitiv minimieren.
Wie werden Grips angezogen und benutzt?
Grips kann man ganz einfach anziehen, in dem man den Klettverschluss löst und die Grips wie einen Handschuh anzieht. Klett verschließen und schon kann man loslegen.
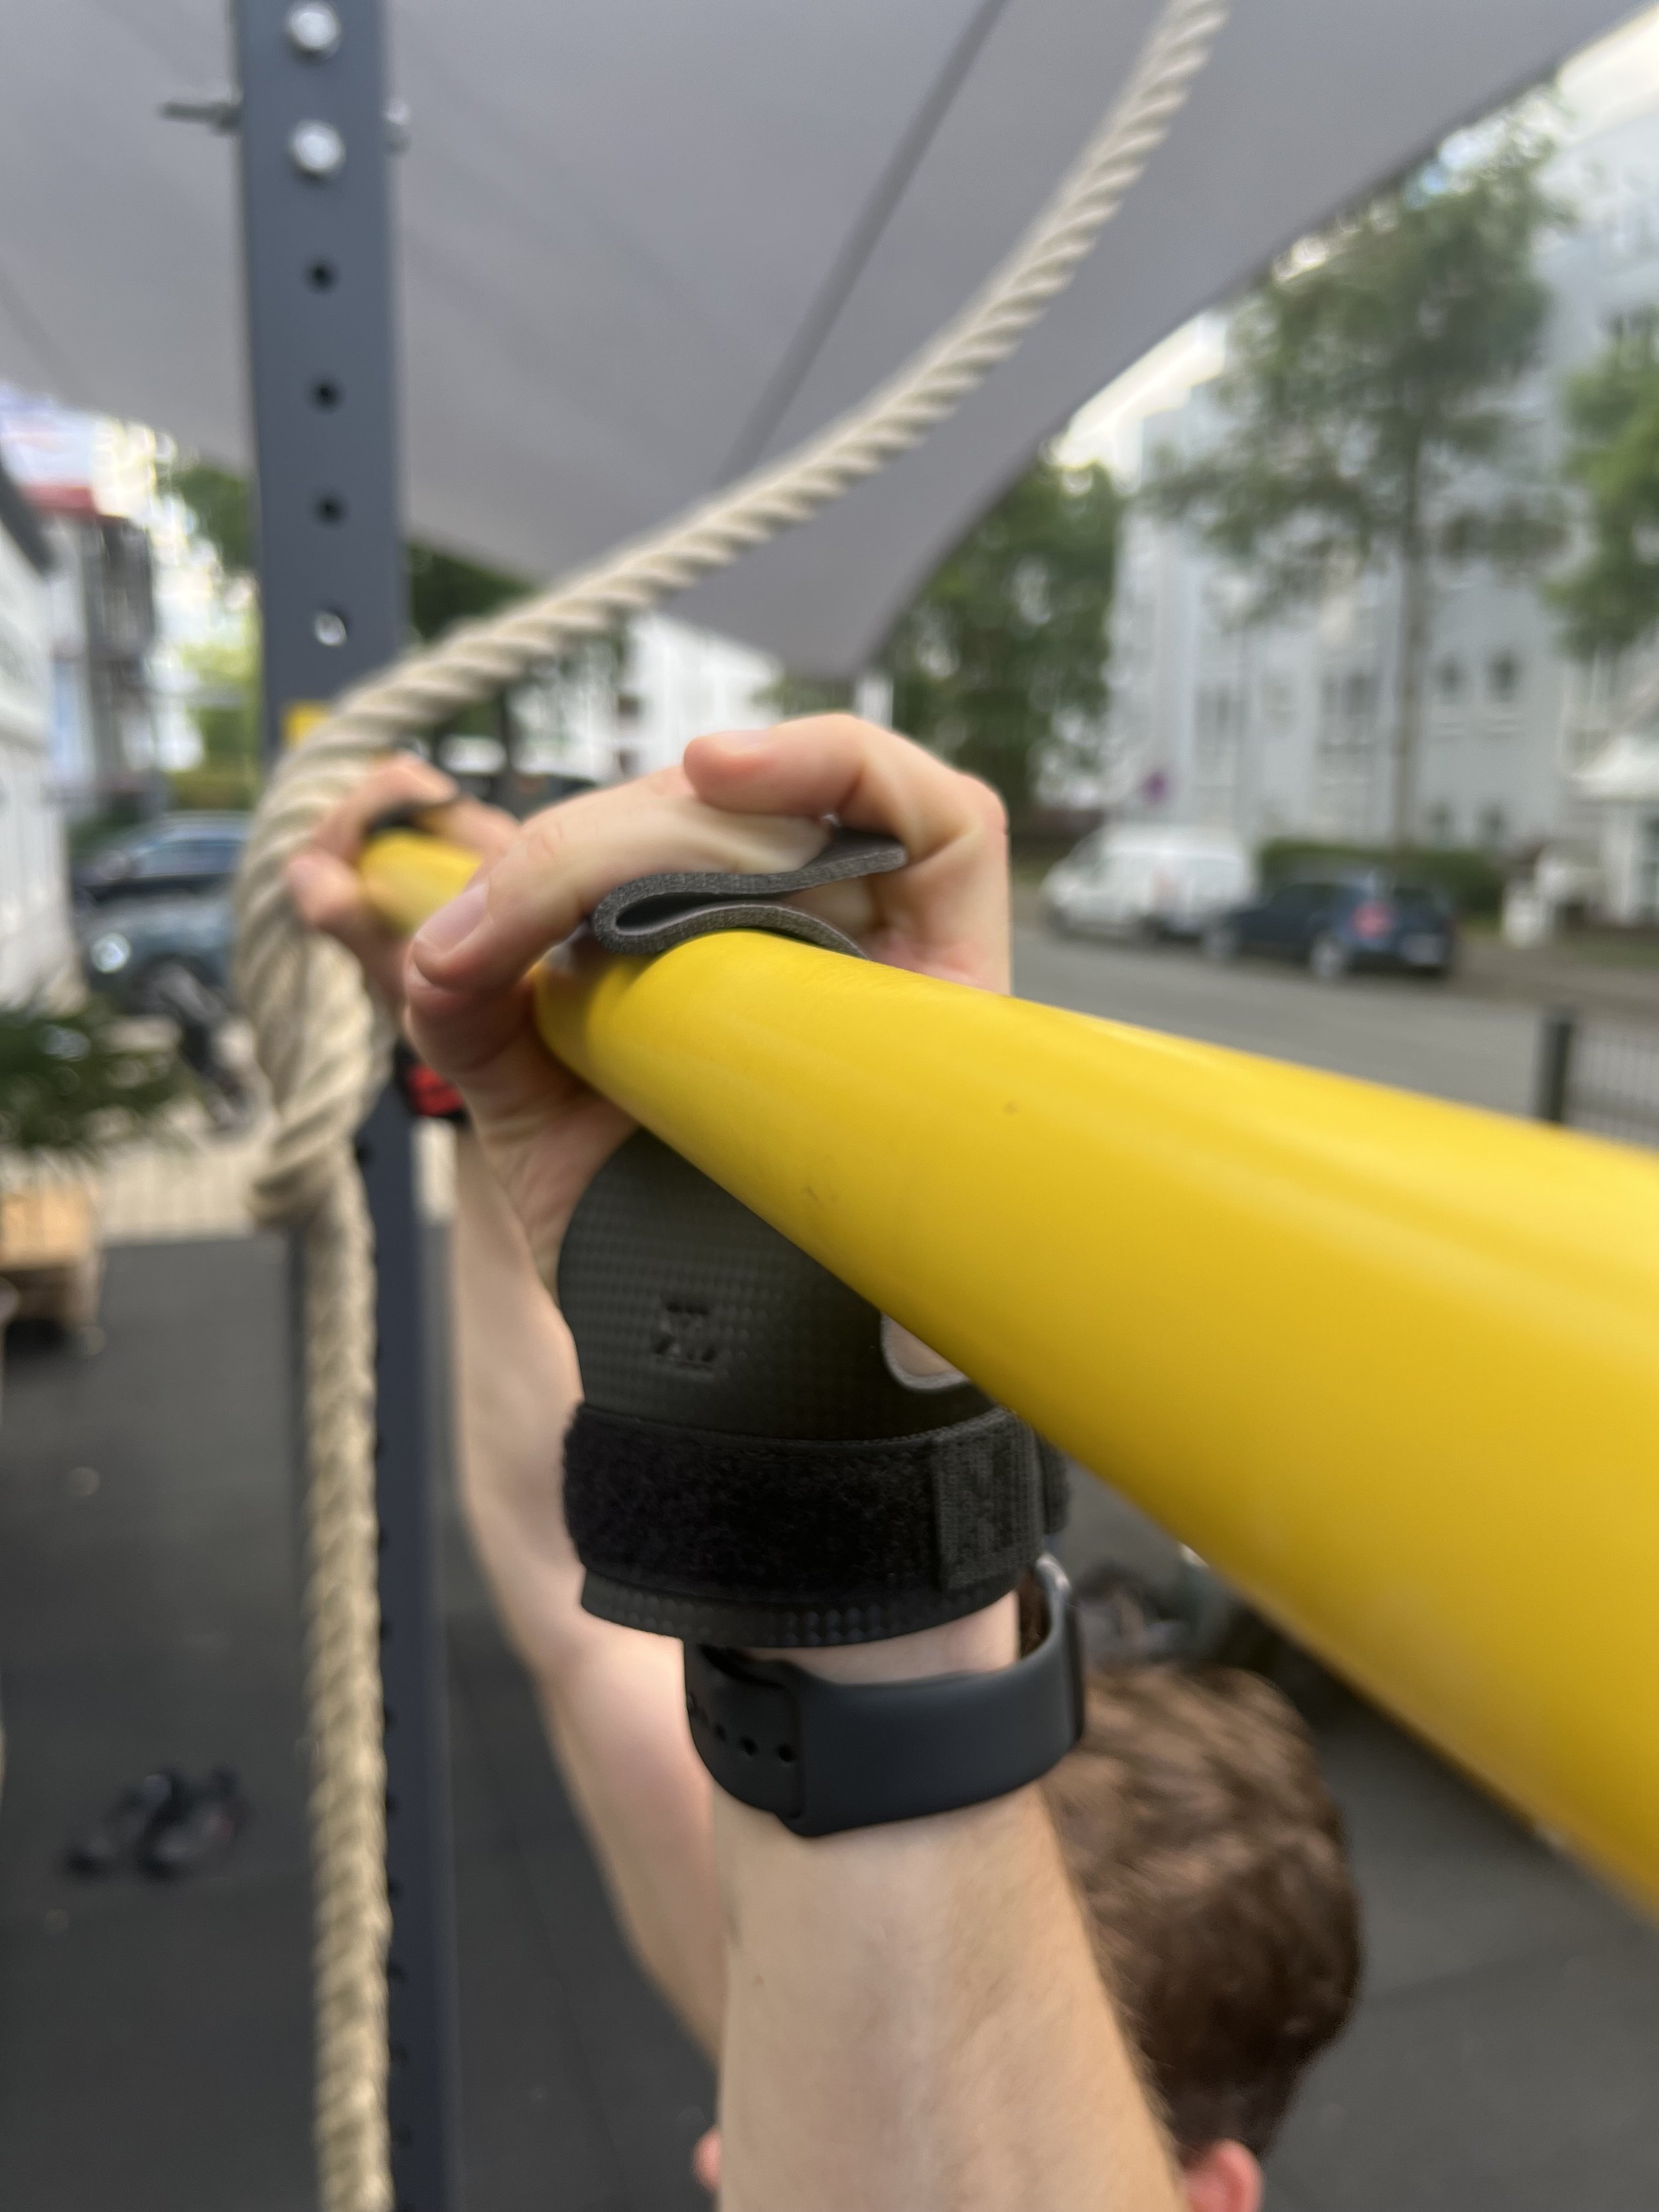
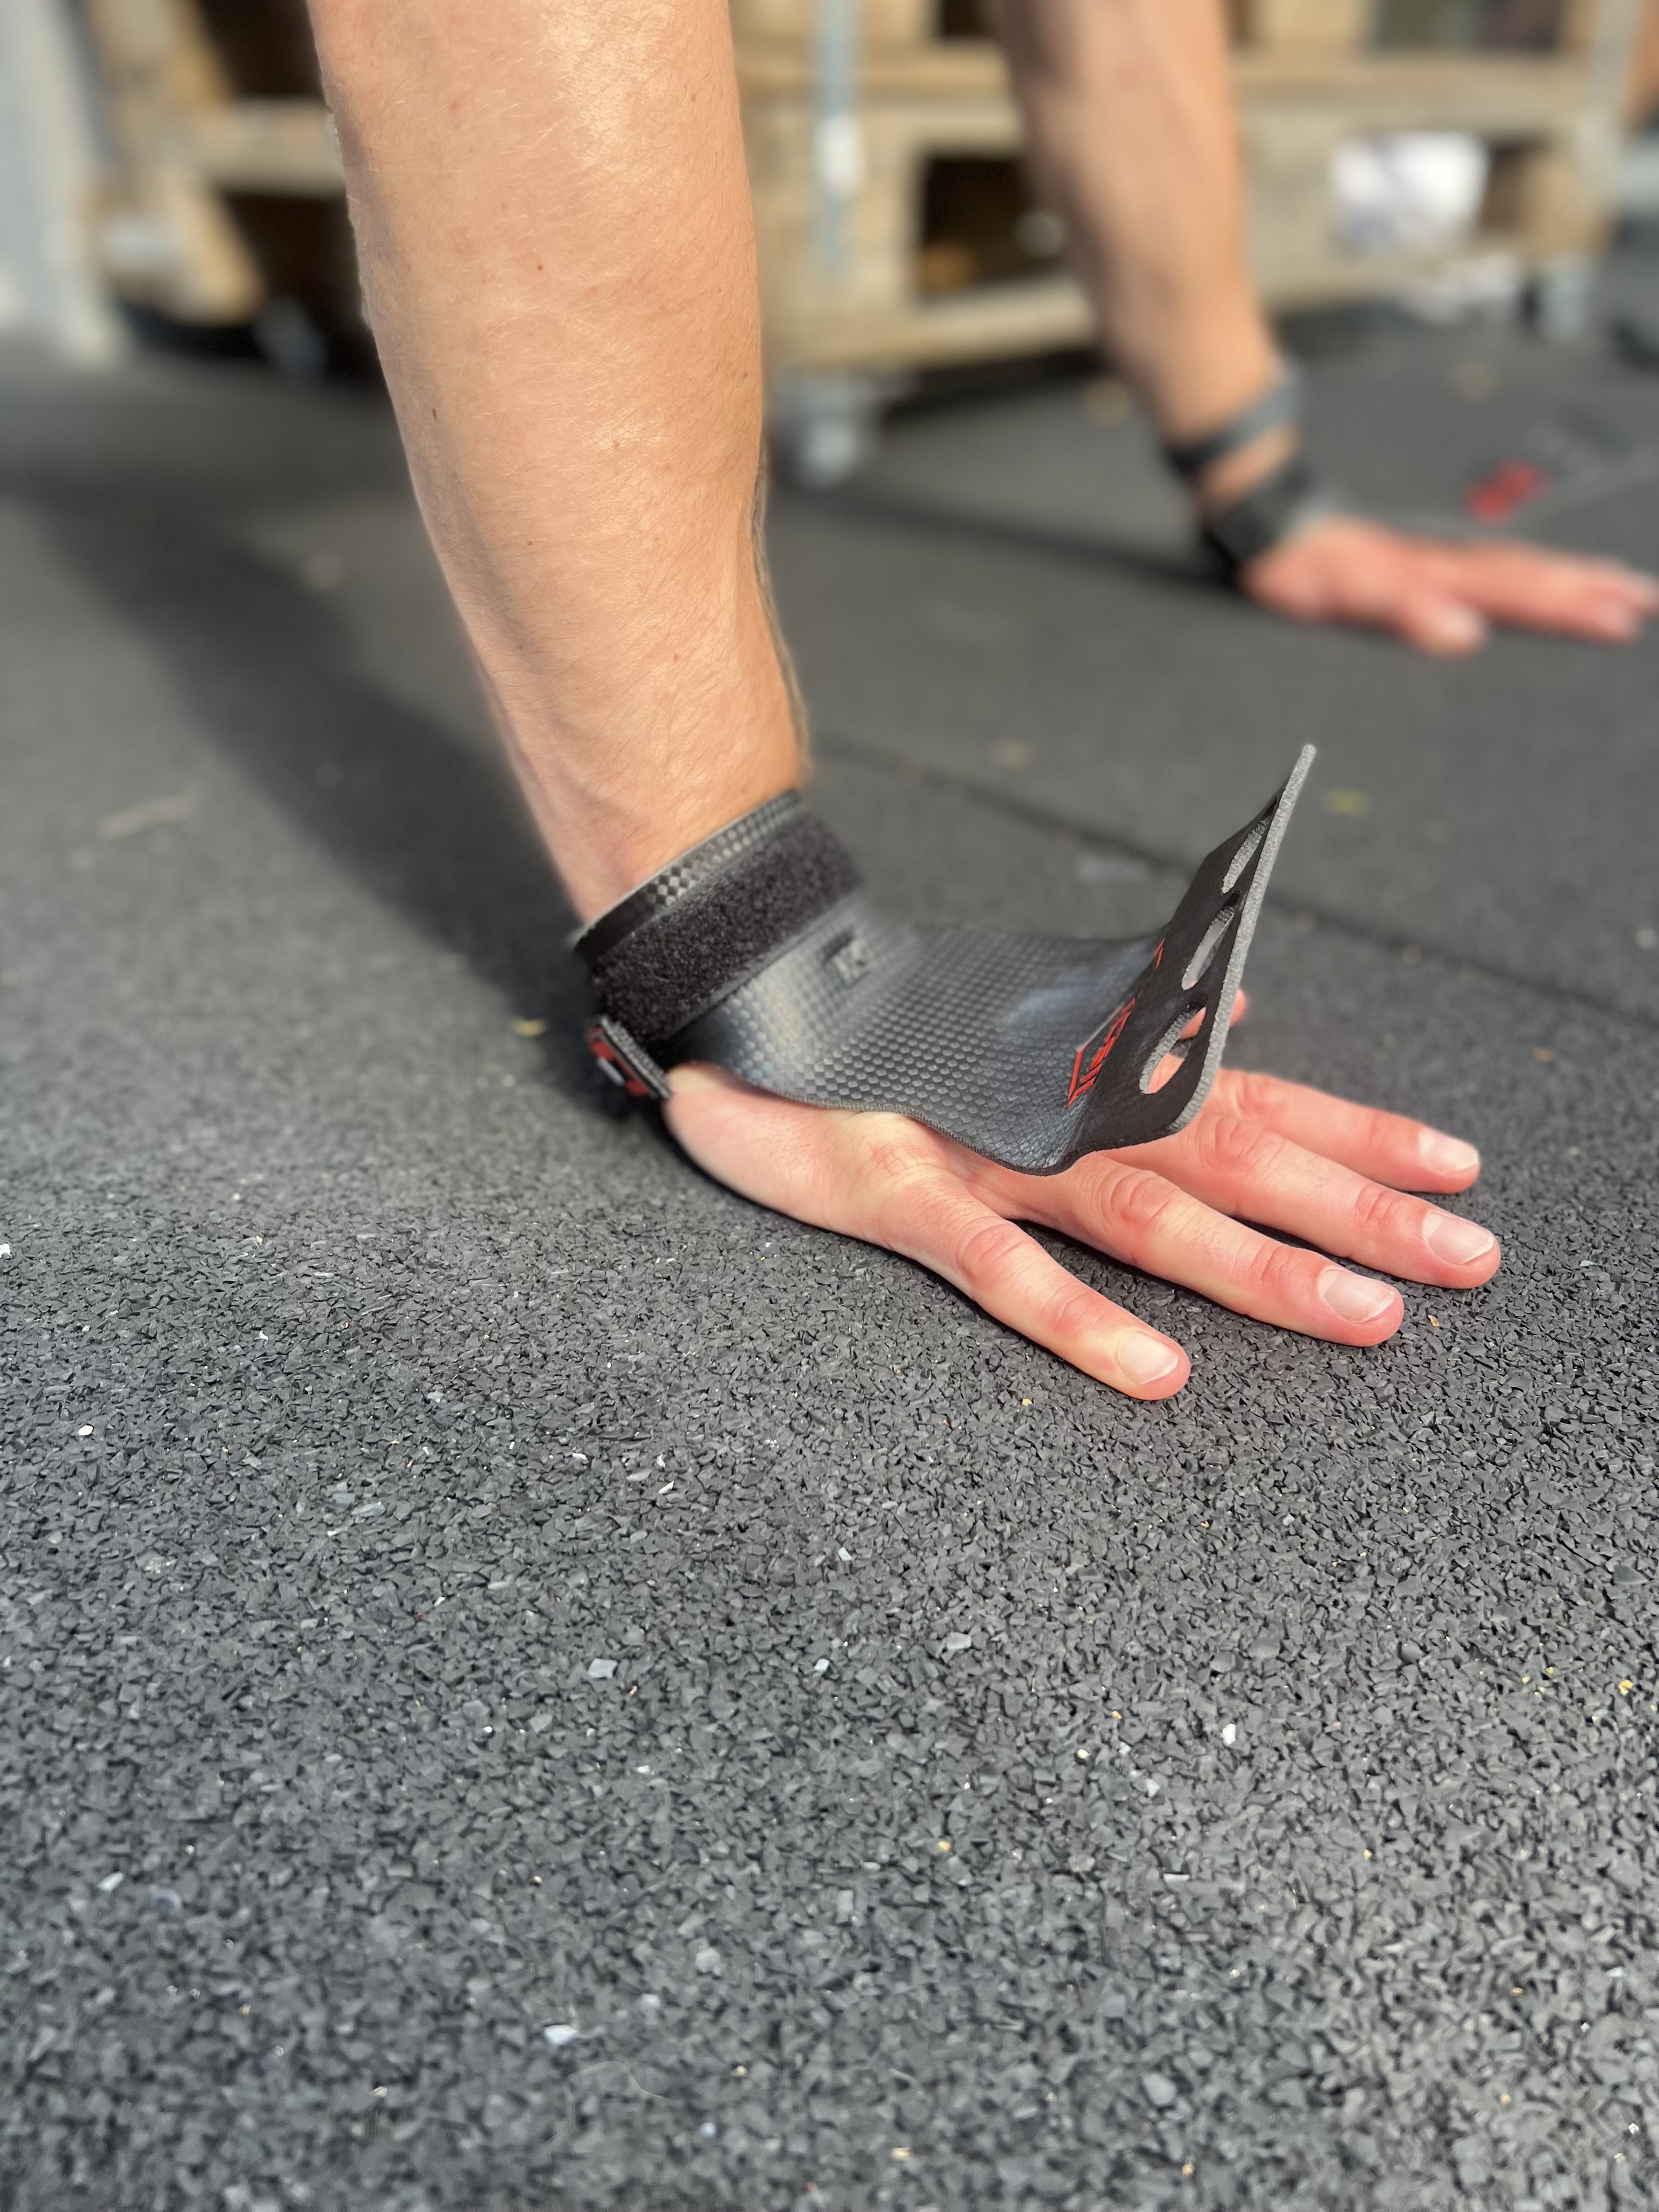
Es gibt die Möglichkeit 2-3 Finger, je nach Anzahl der Löcher zu benutzen oder die Grips einfach nur über die Stange legen. Dabei ist es wichtig, dass man möglichst viel Fläche der Grips an die Stange bekommt, also die Fingerknöchel sollten soweit wie möglich nach vorne zeigen.
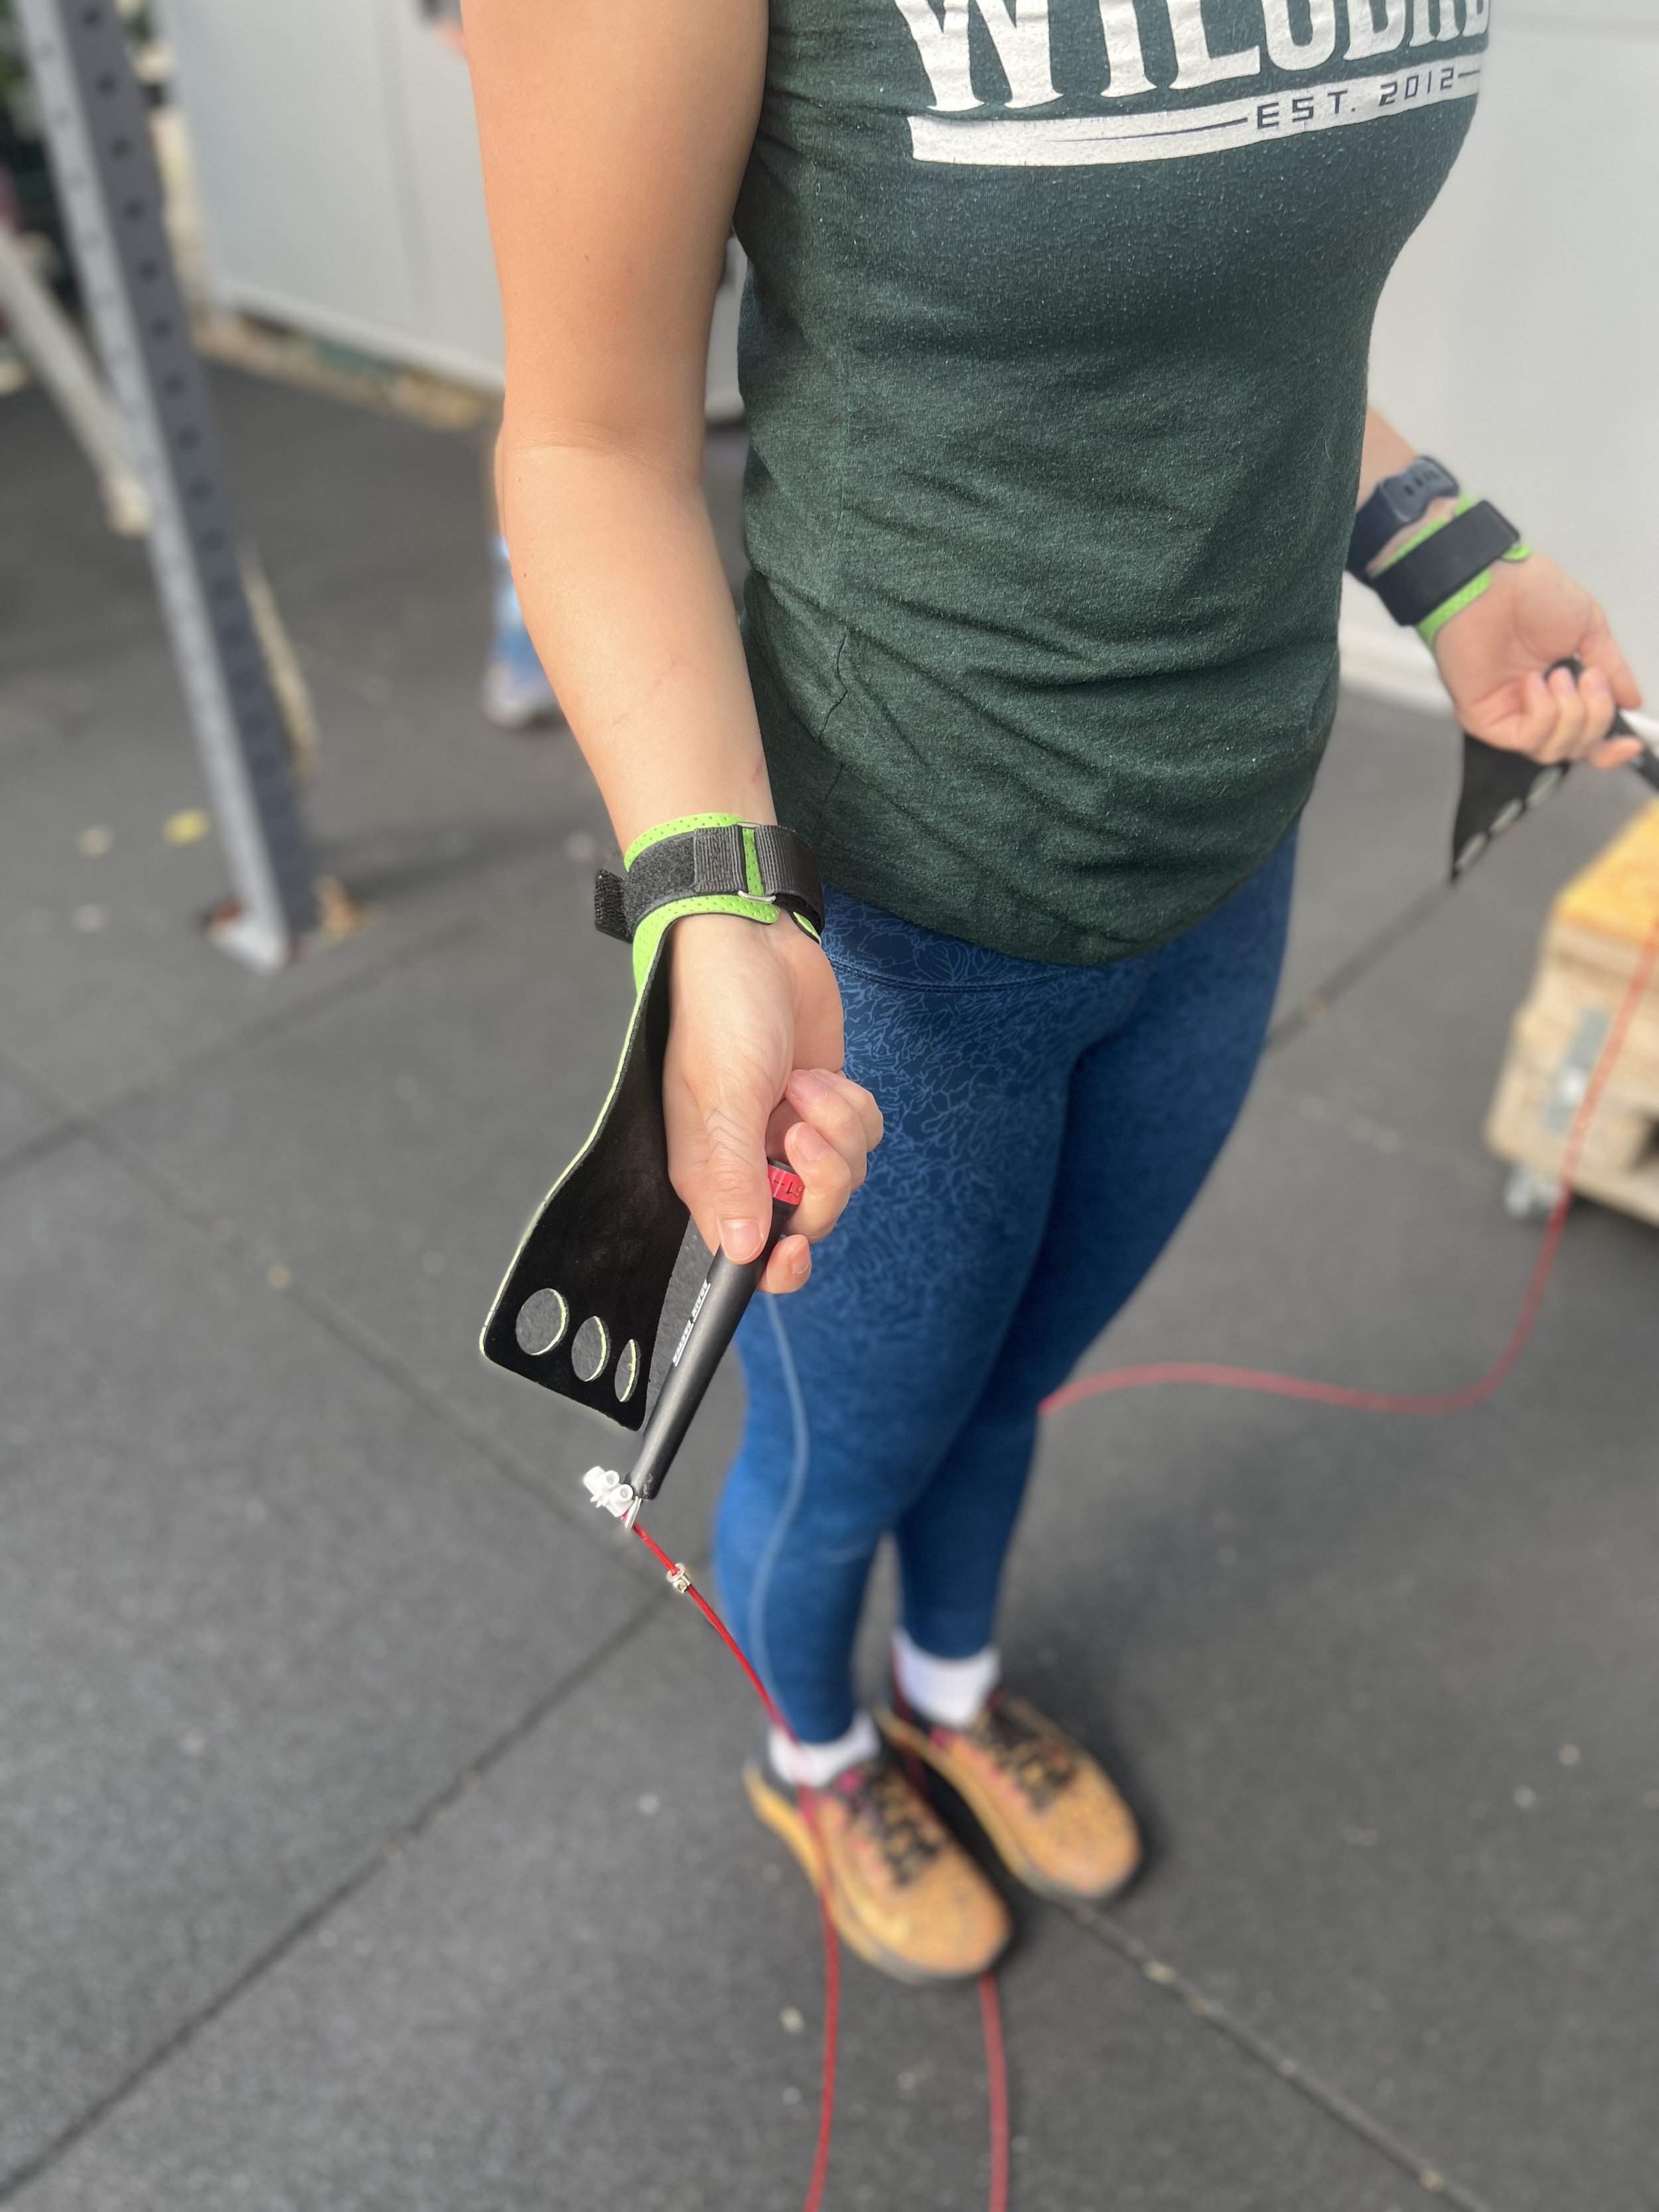
Wenn man in einem Workout neben den bspw. Pull-ups noch weitere Übungen machen muss, kann man den Klettverschluss leicht lösen und die Grips ganz einfach auf den Handrücken drehen, somit stören die Grips auch nicht. Vor allem, wenn man seine Finger nicht in die Löcher eingefädelt hat, kann das Ganze recht schnell gehen.
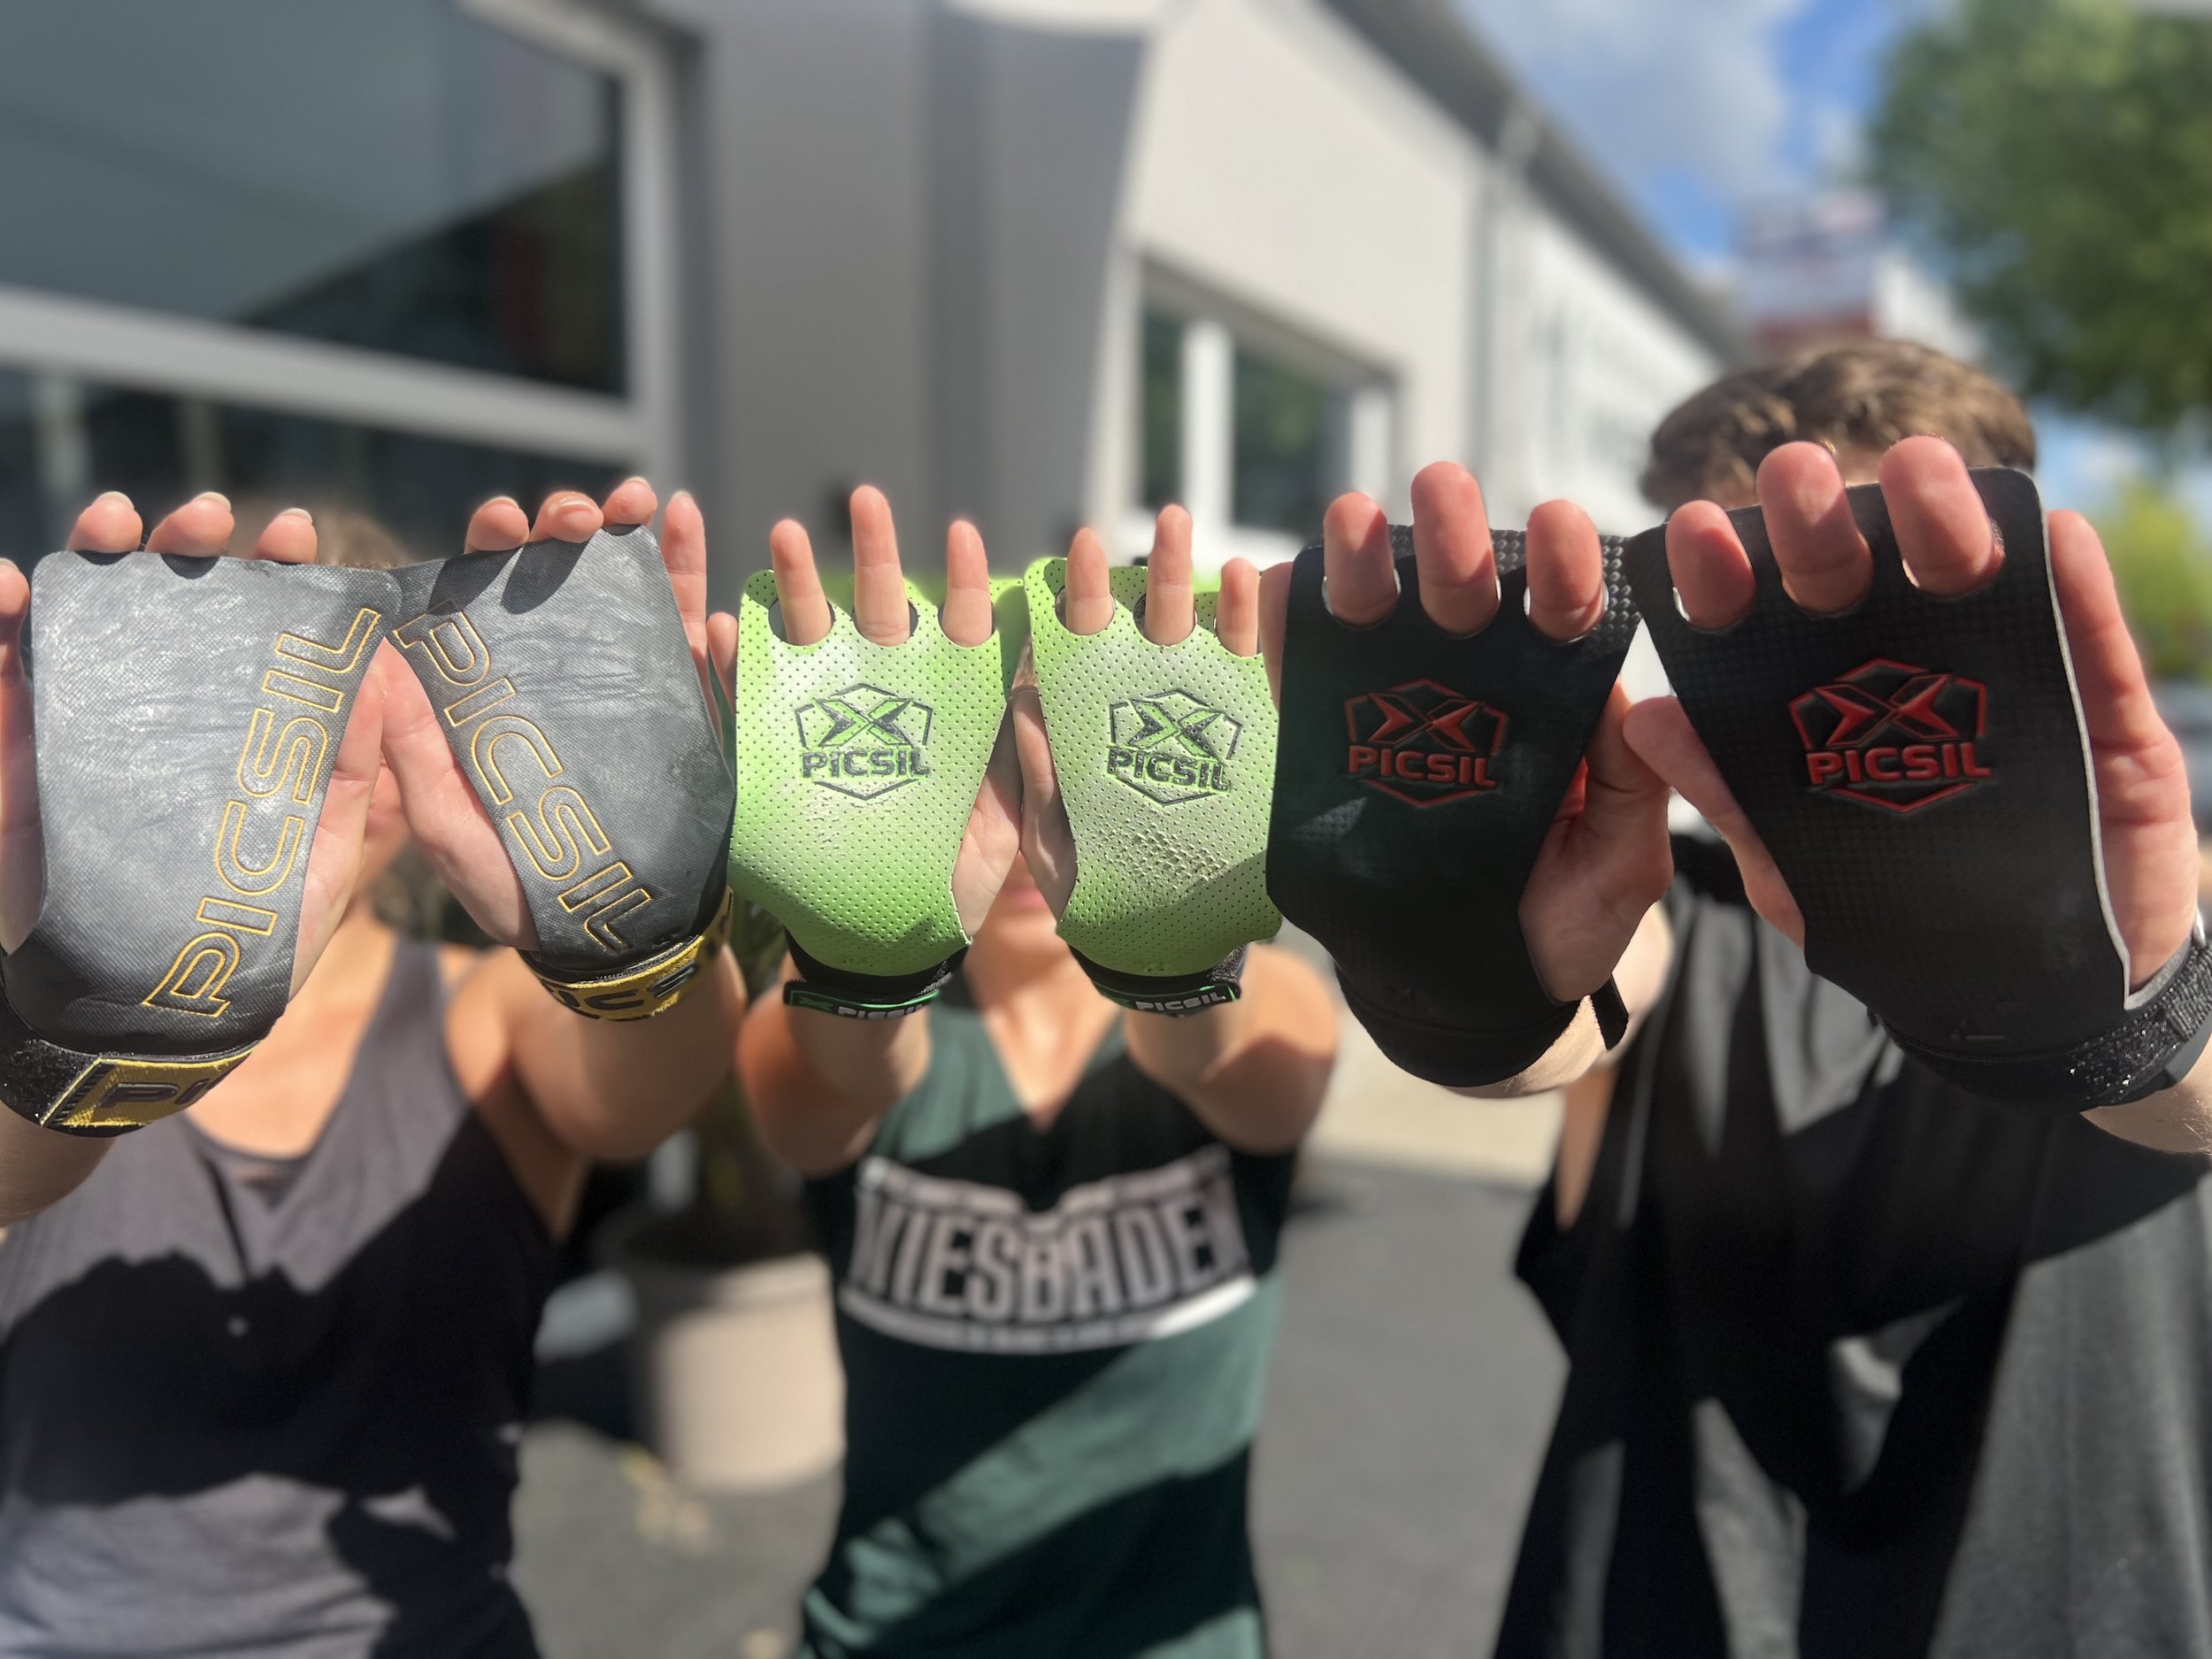
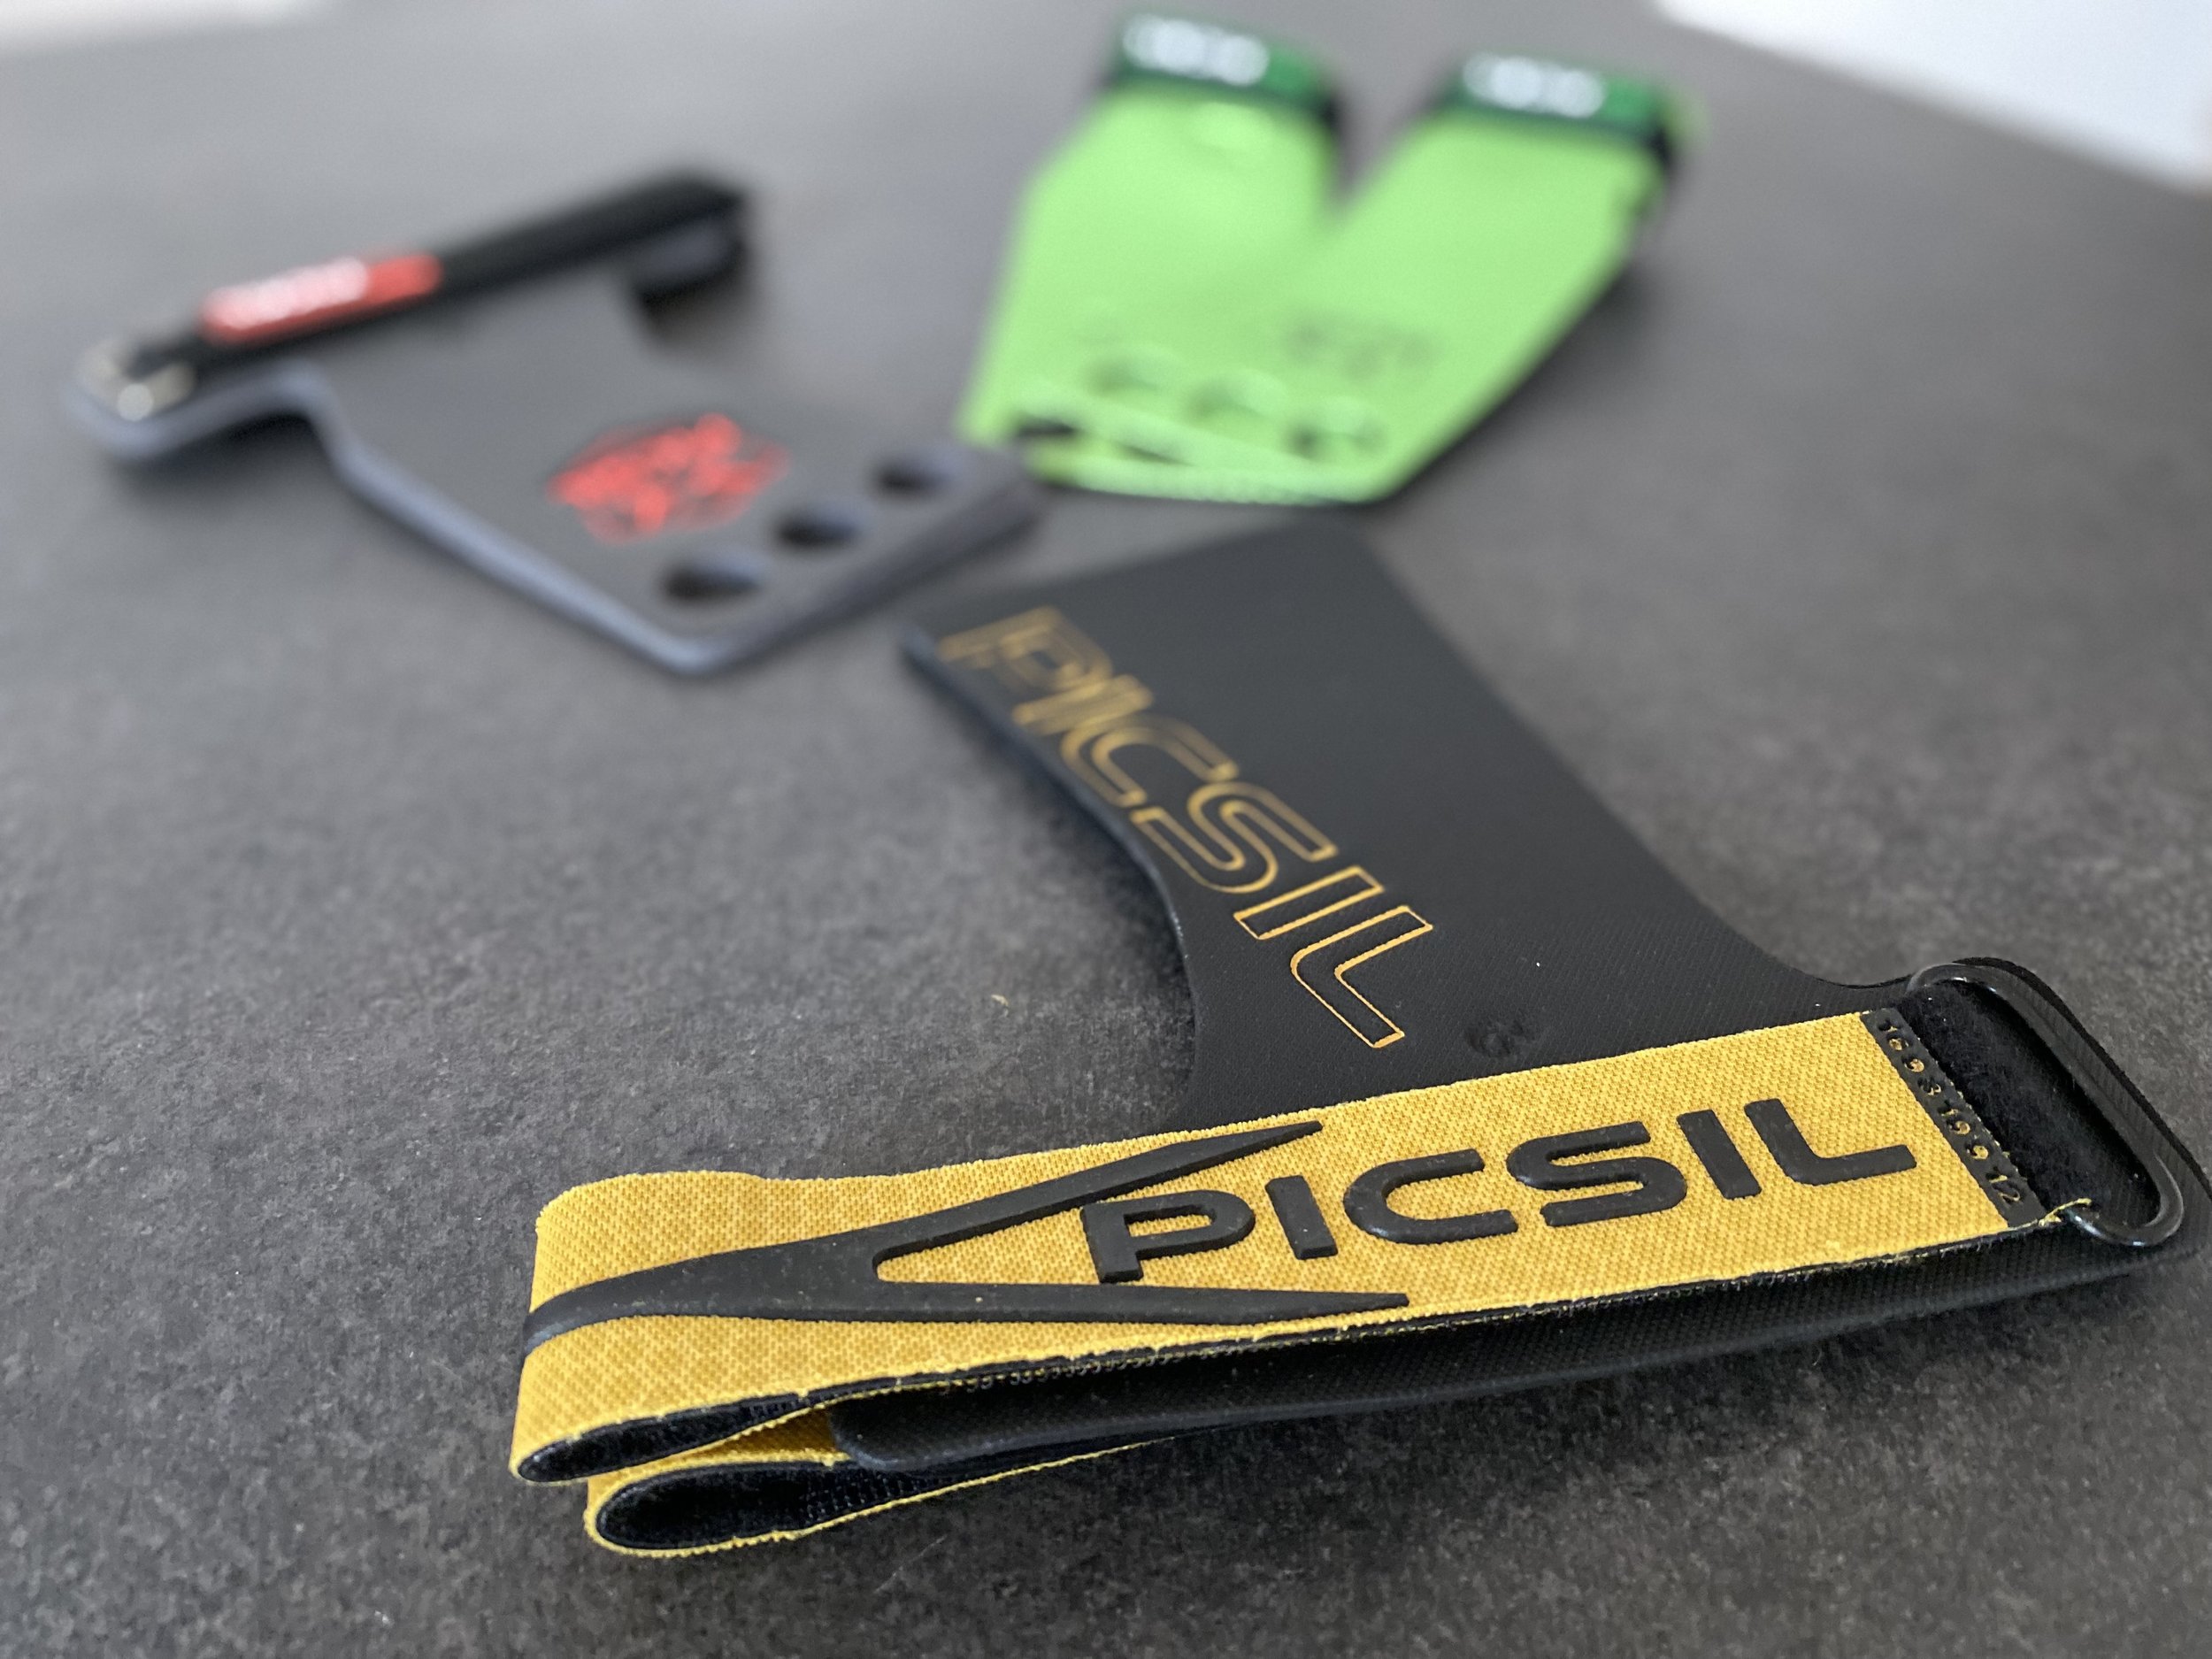
Grips von der Marke Picsil - 4 Grips von Picsil im Vergleich
In den letzten Monaten habe ich vier verschiedene Modelle von Picsil gestestet (3x davon wurden mir zur Verfügung gestellt). Picsil ist eine Marke aus Spanien, die sich auf die Produktion von Grips und CrossFit Equipment spezialisiert hat. Sie existiert seit 2012 und vertreibt neben Grips auch noch Jump Ropes, Gürtel und Kniebandagen.
Schauen wir uns die einzelnen Modelle genauer an:
Disclaimer: Ich habe die Grips lediglich an unseren Stangen getestet, je nach Pull-up Stange und Beschichtung können die Erfahrungen natürlich abweichen.
Picsil Azor Grips 3holes - 36,95€
Vorteil: sehr leichte Grips, mit 1,8 mm Dicke liegen sie recht angenehm in der Hand und man spürt sie kaum. Die Grips sind auch gut für andere Übungen geeignet, wie bpsw. Powercleans.
Nachteil: die Grips verlieren sehr schnell den Chalk und man muss öfters nachchalken, verschleißen schneller als andere Grips.
Picsil Golden Eagle Grips without holes - 38,95€
Vorteil: ebenfalls sehr leichte Grips. Es gibt keine Löcher, somit sind sie schnell einsatzbereit. Großer Vorteil ist die Dicke des Klettverschlusses, sie sind sehr angenehm zu tragen.
Nachteil: ohne Chalk sehr schlechter Grip an der Stange
Picsil Falcon Grips 3 holes - 30,95€
Vorteil: Die Carbonfasern erlauben einen starken Halt an der Stange und sind extrem langlebig. Innenseite mit Stoff ausgelegt, sie fühlen sich dadurch bequemer an.
Nachteil: Klettverschluss ist etwas dünner und nicht so bequem. Für Übungen mit der Langhantel nicht geeignet. Anfangs etwas steifer.
Picsil Rx Grips 3 holes - 28,95€
Vorteil: Wie beim Falcon, bieten die Carbonfasern einen starken Halt an der Stange, das lässt allerdings mit der Zeit nach und ohne Chalk kommt man hier auch nicht weiter. Die Langlebigkeit ist hier sehr positiv, die Grips besitze ich schon am längsten und erfüllen immer noch ihre Dienste.
Nachteil: Klettverschluss fühlt sich nicht ideal an, sehr hartes Material und kein Stoff auf der Innenseite der Grips.
Was ist beim Kauf zu beachten?
Hier ist es in allererster Linie wichtig welche Größe man kauft. Dafür hat der Hersteller eine Größentabelle auf seiner Homepage. Dies ist allerdings nur wichtig, wenn man die Finger auch durch die Löcher stecken möchte. Wenn man die Grips als Ganzes über die Stange legt, kann man gerne auf das größere Modell zurückgreifen.
Danach sollte man sich das Material anschauen. Je dicker und belastbarer das Material ist, desto länger hat man etwas von den Grips. Man sollte ebenfalls nach etablierten Marken Ausschau halten, da diese sich meistens am Markt bewährt haben und solide und gute Produkte anbieten.
2 oder 3 Löcher oder gar keine Löcher? Das ist Geschmackssache. Die Option mit den 3 Löchern bietet den Vorteil, da sie einen größeren Teil der Hand schützt. Wenn man allerdings kleine Hände hat, kann man auch gerne die Option mit den 2 Löchern in Erwägung ziehen. Da durch die Grips die Fläche vergrößert, die man greifen möchte, muss man natürlich auch auf die Dicke der Grips achten. Man muss die Löcher auch nicht nutzen, daher hat man damit die maximale Flexibilität bei der Benutzung.
Fazit:
Am Ende unterscheidet sich das günstigste Modell von Picsil zum teuersten Modell um knapp 9 € (Bei den meisten etablierten Herstellern kosten die Produkte zwischen 25-50€). Es geht also eher um das Abwägen, welche Vor- bzw. Nachteile man genießen möchte. Es gibt allerdings nicht immense Unterschiede zwischen den einzelnen Modellen. Alle erfüllen ihren Zweck und schützen am Ende die Hände und halten dich länger an der Stange. Wenn ich mich entscheiden müsste, zwischen den vier Modellen, würde ich mich wahrscheinlich für die Azor Grips entscheiden, da sie für mich am bequemsten in der Hand liegen.
Am Ende muss man allerdings trotzdem Kraft aufbauen, um Pull-ups zu erlernen, sie sind also kein Shortcut, nur weil man länger an der Stange hängen kann. Ich würde jedem empfehlen, der den Sport regulär betreiben möchte, sich ein Paar zuzulegen und sie bei den jeweiligen Übungen einzusetzen. Allerdings sollte im gleichen Atemzug auch mehr Liebe seinen Händen und der Hornhaut geschenkt werden, eine gute Handpflege wird durch das Tragen von Grips nicht ersetzt.
Über die Langlebigkeit von Grips kann ich nicht allzu viel schreiben, da ich nicht täglich trainiere und mehrere Modelle besitze. Allerdings muss man sich im Klaren sein, dass Grips nicht ewig halten und das Material irgendwann nicht mehr den optimalen Schutz und Griff gewährleisten kann.
Tipp: Falls dich der Klettverschluss am Handgelenk stört oder schmerzt, einfach ein Schweißband ans Handgelenk ziehen und den Verschluss darüber anbringen. Viel Spaß mit deinen Grips beim Training.
Viel Spaß beim Training!
CrossFit Gymnastic Grips
In this blog post you will learn everything you should know about grips and how to use them. We also introduce you to four different Picsil models and explain the differences.
What are grips and in which exercises or workouts are they used?
Grips are so-called "gymnastic straps", modified for use in CrossFit exercises. They are usually made of a synthetic fabric and are used for better grip and protection of the hands. They are attached to the wrist with a Velcro fastener (see picture).
Grips are mainly used for all exercises on the pull-up bar, e.g. pull-ups, toes to bars or muscle-ups. They help to get a better and safer grip on the bar and especially in combination with the wrist fastener you can hang on the bar longer. This means that larger sets or more repetitions are possible without losing your grip. Especially if you tend to sweat on your palms, grips are a great help in addition to chalk. However, you can also use them for exercises with kettlebells or barbells.
Why should I use Grips?
In addition to the already mentioned obvious plus that you hang more securely and longer on the bar and thereby improve your workout performance, another advantage is that you protect your hands from tearing with grips. That doesn't mean it can't happen, just the danger is minimized because you're not in direct palm contact with the bar.
Ripping usually happens when you use a lot of chalk. This often dries out your hands (which is of course intentional, you want a non-slip grip on the bar). However, if you already have a lot of calluses on your hands and you don’t take proper care of your hands, i.e. shave off calluses and keep them soft with creams, it can happen that the calluses come off your hand completely. This usually means that you have to take it easy in training for the next week until your palms have healed completely. You can definitely minimize the danger with grips.
How are grips put on and used?
Grips are easy to put on by loosening the Velcro and putting on the grips like a glove. Close with Velcro and you're good to go.
There is an option to use them with 2-3 fingers depending on the number of holes or just place the grips over the bar. It is important that you get as much surface area of the grips on the bar as possible, i.e. the knuckles should point forward as far as possible.
If you have to do other exercises in a workout in addition to the pull-ups, for example, you can easily loosen the Velcro and simply turn the grips on the back of your hand, so the grips don't get in the way either. Especially if you don't use the finger holes, you can transition pretty fast.
Grips from the Picsil brand - 4 grips from Picsil in comparison
In the last few months I have tested four different Picsil models (3 of them were proviced by Picsil). Picsil is a brand from Spain that specializes in the production of grips. It was founded in 2012 and, in addition to grips, also sells jump ropes, belts and knee bandages.
Let's take a closer look at each model:
Disclaimer: I only tested the grips on our bars, depending on the pull-up bar and coating, of course, experiences can vary.
Picsil Azor Grips 3holes - €36.95
Pros: very light grips, with a thickness of 1.8 mm they are quite comfortable in the hand and you can hardly feel them. The grips are also well suited to do other exercises, such as Powercleans.
Cons: the grips lose the chalk very quickly and you have to re-chalk more often, they wear out faster than other grips.Picsil Golden Eagle Grips without holes - €38.95
Pros: also very light grip. There are no holes, so you can use them quite easily. Great advantage is the thickness of the velcro, it feels very comfortable to wear
Cons: very poor grip on the bar without chalkPicsil Falcon Grips 3 holes - €30.95
Pros: The carbon fibers allow a strong grip on the bar and are extremely durable. Lined with fabric on the inside, they feel more comfortable
Cons: Velcro is a bit thinner and not as comfortable. Not suitable for exercises with the barbell. A little stiff at first.Picsil Rx Grips 3 holes - €28.95
Pros: As with the Falcon, the carbon fibers offer a strong grip on the bar, but this wears off over time and you can't get any further without chalk. The longevity is very positive here, I've owned the grips the longest and they still do their job.
Cons: Velcro doesn't feel ideal, very hard material and no fabric on the inside of the grips.
What to consider when buying?
The most important thing here is what size you buy. Picsil has a size chart for this on their website. However, this is only important if you also want to put your fingers through the holes. If you put the grips as a whole over the bar, you are welcome to use the larger model.
Then you should look at the material. The thicker and more resilient the material, the longer the grips last. You should also look out for well-established brands, as these have mostly proven themselves in the market and offer solid and good products.
2 or 3 holes or no at all? That's a matter of preference. I would always prefer 3 holes to 2 holes as they just protect more surface of your hand. In addition, you do not have to put your fingers in the holes, so you can use them with maximum flexibility.
Conclusion:
In the end, the cheapest Picsil model differs from the most expensive model by almost 9€ (most established manufacturers cost between 25-50€). So it's more about weighing up which advantages (and disadvantages) you want to enjoy. However, there are not huge differences between the individual models, all serve their purpose and end up protecting your hands and keeping you longer on the bar. If I had to choose between the four models, I would probably choose the Azor Grips as they are the most comfortable in my hand.
In the end, however, you still need to build strength to learn pull-ups, so they're not a shortcut just because you can hang longer on the bar. I would recommend anyone who wants to practice the sport on a regular basis to get a pair and use them with their respective exercises. However, in the same breath, you should give more love to your hands and calluses, hand care is not replaced by wearing grips.
I can't write too much about the longevity of Grips as I don't train every day and own several. However, you have to be aware that grips don't last forever and at some point the material can no longer guarantee optimal protection and grip.
Tip: If the Velcro closure on your wrist bothers you or hurts you, simply pull a sweatband around your wrist and attach the closure over it. Have fun with your grips while training.
Have fun training!